Mobile Planer Stand With Chip Collection Workshop Projects
I bought a new DeWalt DW735 planer nearly a year ago, and I can count the times on two hands that I’ve used it. The main reason is that I didn’t have many projects that required it, what with my move to a new house and the renovation that had to be done before the garage became my new workshop.
Another reason is that it was not really complete when I bought it. Unlike most planers of this type, this one does not come with infeed and outfeed tables. Along with that, it also doesn’t come with a basic stand to put it on. Indeed, the cost can easily be nearly doubled if you have to buy these two items to start using the machine.
Being the frugal, do-it-yourself type that I am, I figured it would be a good project to make a stand that included infeed and outfeed tables. Along with that, I could make the stand so that it holds a bin to collect the shavings from the planer. This planer stands out from all others (that I know of), in that it has a powerful built-in blower capable of pumping the chips into a collection bin.
Before starting in on the build, I had to figure out how big the stand would be and what I would use for the bin. My first thought was to make a box from 1/4″; plywood, but decided that making the stand big enough to accommodate a regular plastic trash can would be better.
Setting it up to visualize a layout for it:
.jpg)
I’m recycling the short, flexible hose from my old dust collector for this project, since it was not needed on the rebuild. Once again, I’m not working with any real plans, just piecing it together as I go.
I traced the outside circumference of the trash can on the plywood that will be used for the top of the stand to see where the port would have to be:
.jpg)
.jpg)
I then cut a hole through and also made a collar for the hose adapter to fit into.
.jpg)
The adapter is glued into the collar with polyurethane construction adhesive.
I did it this way so that the collar could be screwed down to the top of the stand, thinking it could be removed easier.
I’m still not sure why I thought that was important.
In any case, I let the glue cure overnight before handling it again.
The objective is to make the stand as simple as possible, with a plywood top, plywood bottom shelf and 2×3 legs. I cut the legs from pieces of 2×10 spruce:
.jpg)
.jpg)
They are cut to the right length and screwed to the top.
Stretchers are cut from 3/4″; plywood and screwed to the legs. I was careful to make sure these were in the right place, so that the trash can would fit properly between the bottom shelf and the top:
.jpg)
.jpg)
Two shorter stretchers at the ends are screwed into the long ones.
Then the bottom shelf is glued and nailed to the stretchers:
.jpg)
.jpg)
I put the planer on the stand to get an idea of where it needs to be. Originally, the 2×2’s were going to go under the planer, thinking the plywood top needed to be reinforced. I later changed my mind on that, figuring the 3/4″; plywood was strong enough on its own.
To adapt the flexible hose to the PVC sewer pipe, I made a fitting by cutting a section out of one pipe to fit inside the other:
.jpg)
The shorter one fits inside the elbow and the flex hose slips right onto the smaller one:
.jpg)
.jpg)
With this done, I had to make sure the planer could open to its maximum capacity without pulling the hose off. Well stretched, but still attached.
.jpg)
Since the blower will be pumping air into the trash can, it needs a way to escape. I cut a hole through the plywood top for the exhaust port. This will have a screen put over it to stop the finer shavings from getting blown out.
With the basics done, it was time to get started on building the infeed / outfeed. This is a single piece of melamine that goes right through the planer and becomes the new bed. This is something that I saw Jay Bates had done with his, so I figured it would work for me too:
.jpg)
.jpg)
I wanted edges on the melamine to clean it up and guide the wood being planed, and I cut pieces of maple for this.
The melamine not only provides an unbroken path through the machine, it also has a very slick surface. That was a problem I was having with the planer: the polished bed was ‘sticky’, and the feed rollers couldn’t put the stock properly.
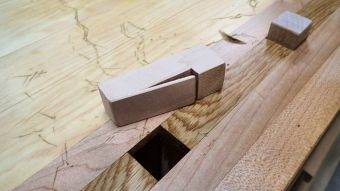
The notches in the maple strips (shown in the picture above, right) fit around the stock guides that are on the planer bed:
.jpg)
.jpg)
Glue and nails attach the strips to the melamine. They stick up about 1/4″; above the melamine.
With the strips put on the new bed, I had to check to make sure that the side shields on the machine clear it:
.jpg)
Just enough space. This is a good view of how the maple strips fit down over the metal guides.
To attach the planer to the top, I made these blocks from plywood, glued and nailed at each corner of the machine:
.jpg)
.jpg)
These keep it in place, and the new melamine bed will hold it down. No bolts required. I used the same method on my folding miter saw stand to good effect
.jpg)
The infeed projects out about 6″; and I made a fancy hardwood bracket to support it.
Note the plywood on the bottom of the bracket hooks under the top of the stand, holding the new bed tight to the planer. This also holds the planer down on the top of the stand.
The outfeed side comes out a bit further, and I put precisely cut pieces of maple between the melamine bed and the top of the stand as spacers. I used my long reach clamps to hold it down while I fasten it in place:
.jpg)
.jpg)
Just two screws through the outfeed and into the maple blocks hold it. The blocks are screwed to the top from underneath. If the bed needs to be replaced, it can slide out after these screws are removed.
The only thing left to make before I can test it is the filter. Here I’ve made a simple frame from plywood that has a slight recess cut in each side:
.jpg)
.jpg)
Regular window screen is cut to size.
To attach it to the frame, I drove a finish nail into each corner to put it taut. A thin bead of silicone is then smeared on to glue the screen to the frame:
.jpg)
.jpg)
I let that dry for a few hours then removed the nails.
It fits neatly in the space beneath the outfeed table:
.jpg)
Testing it out with a piece of spruce:
.jpg)
.jpg)
The filter screen stopped all of the fine shavings, and despite the filter being this clogged, there didn’t seen to be any reduction in airflow.
A better strategy is to pull the bucket out halfway before pulling out the filter, so that the shavings fall into the bucket, and not on the floor.
I’m considering a baffle that would just sit on the ledge inside the bucket to stop some of the chips from flying back up, and that’s something I’ll try soon:
.jpg)
.jpg)
To keep the can in the right place, I nailed and glued on some blocks around the back side.
To make the stand easy to move around, I made these casters:
.jpg)
.jpg)
I got the wheels from a pair of cheap, fixed casters and bolted them to the 1/2″; plywood brackets. These are screwed on the sides of the front legs. By tipping it up, the wheels contact the floor and it will roll effortlessly, wheelbarrow style.
Finished and moved out into the workshop floor, ready to use. It’s not my prettiest creation, but it’s functional and that’s what counts:
.jpg)
.jpg)
Not a difficult project and it took very little time to build. I expect I’ll get a lot more use out of this planer from now on.
I made a short video showing it off and a brief demonstration of the collection system in action:


